


The Golden Rules to Prevent Frying Odors from Lingering in Your Home
The crunch of french fries, the delicious taste of perfectly cooked fish... Frying is undoubtedly one of the most beloved culinary delights in our kitchens. But there is another side to the coin: that stubborn, heavy oil odor that permeates curtains, sofas, and every corner of the house hours or even days after cooking is done. So, while enjoying the pleasure of fried food, do you have to suffer the ordeal of frying odors in the house? Absolutely not! With the right strategies, the art of preventing frying odors is now in your hands.
Your Odor Prevention Strategy
Phase 1: Pre-Cooking Preparation – Setting Up the Defense Line
The battle against odor begins before you even turn on the stove. These preparatory steps are critical to prevent the smell from leaking out of the kitchen.
- Strategic Ventilation: Don't just ventilate during cooking; crack open the kitchen window or balcony door 5-10 minutes before you start. Turn on your range hood at the lowest setting as well. The goal is to create an airflow, giving odor molecules an escape route.
- Isolate the Area: Close the kitchen door and any doors leading to other rooms in your house. This traps the odor in a single space.
- Choose the Right Oil: Opt for oils with a high smoke point (like sunflower, canola, or hazelnut oil). Oils that burn and smoke at low temperatures cause a much heavier and more lingering odor.
Phase 2: During Cooking – Instant Battle Against Odor
In this phase, where odor molecules spread most intensely, you can be proactive and neutralize them as they form.
Use Your Range Hood Like a Pro
Run the hood on the highest setting. Remember, if your hood filters are clogged with grease and dirt, the suction power will drop significantly. Range hood cleaning is critical for effective bad odor elimination. Clean or replace your filters regularly.
Your Secret Weapons in the Kitchen
- Odor Shield Pot: Boil water in a small pot on the back burner of the stove. Toss in a few slices of lemon, orange peels, cinnamon sticks, or a splash of vinegar. The steam from this mixture helps catch and neutralize the oil molecules spreading from the frying pan in the air.
- Preventive Neutralization: ODORGO Candle: The best defense is a good offense. Lighting an ODORGO Odor Eliminating Candle in your kitchen right before you start frying will begin to catch and destroy odor molecules as they spread into the air. This is the most professional preventive intervention to stop odors from clinging to surfaces.
Phase 3: Post-Cooking – Erasing the Traces Completely
The cooking is done, now it's time to destroy the last remaining traces of the odor. This phase prevents the smell from becoming permanent.
- Immediate Cleaning: Dispose of the frying oil in a closed container as soon as it cools down. Clean your pan and stove immediately. Oil residues left on surfaces will continue to emit odors for hours.
- Resetting the Air: Continue to ventilate the kitchen and your house for a while longer. After ventilation is complete, a final touch is needed for the last stubborn molecules lingering in the air.
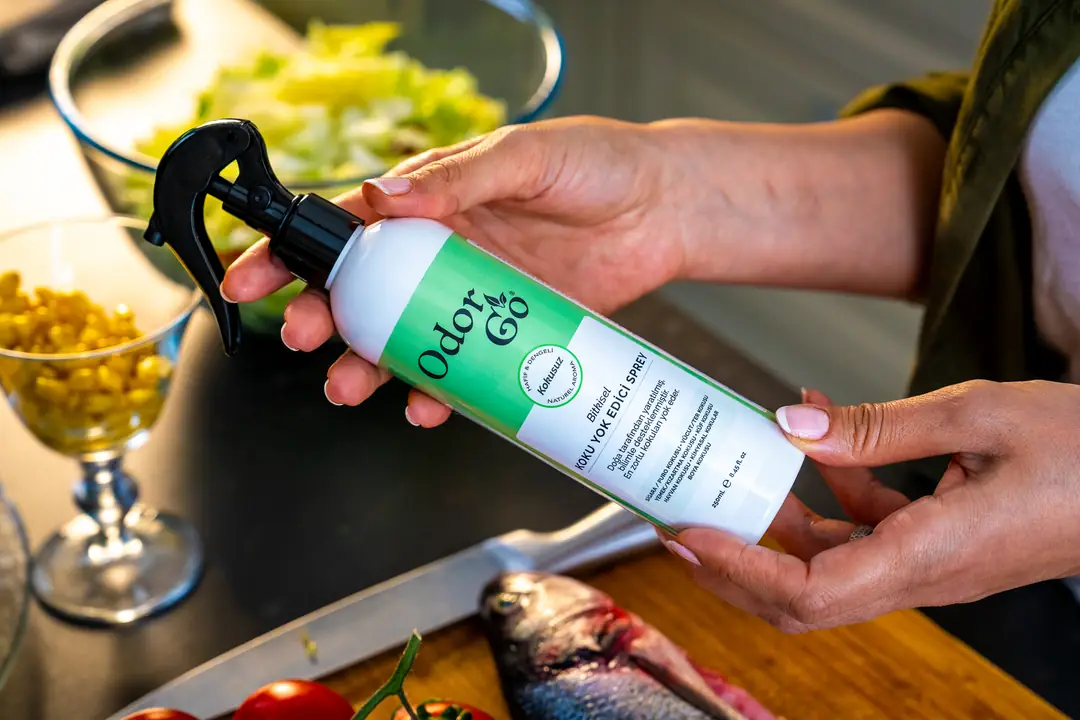
- The Final Touch: ODORGO Spray: Spray a few spritzes of ODORGO Odor Eliminating Spray into the kitchen air, onto curtains, and nearby furniture. This destroys the final odor particles that slipped away and are trying to cling to surfaces, ensuring you complete your cleaning operation with 100% success.
Conclusion: The Pleasure of Frying is Yours, Let the Odor Be History!
As you can see, preventing frying odors is not just a single step, but a holistic strategy. By setting up your defense line before cooking, acting proactively during cooking, and completely erasing the traces afterwards, you can eliminate this annoying problem from your life. ODORGO's natural and effective products add professional power to every stage of this strategy, allowing you to enjoy only the pleasure of delicious meals in your home.
Discover ODORGO Solutions Against Kitchen Odors!